Technique

New Website Launch

mike-padua-new-website

It’s official: my new website has launched. It’s much easier and smoother to navigate, and it’s optimized to work on big screens, small screens, and everything in between. The pictures are beautifully displayed and all the functionality to deliver pictures to clients quickly and securely remains.

HUGE thanks to Photoshelter for providing the amazing tools they do for photographers.

Check it out!

Get social:

twitter-logo-square-black-whitefacebook-blk


Tags: , , , , , , , , , , , , , , , , , , , , , , , , , , , , , , , , , , , , , , , , , , , , , , , , , , , , , , , , , , , , , , , , , , , , , , , , , , , , , , , , , , , , , , , , , , , , , , , , , , , , , ,
Posted in Actors, Digital, Headshots, Lighting, Musicals, Photography, Portfolio, Portraits, Production, Promotion, Studio, Technical, Technique, Technology, Theater, Theatre No Comments »

Revisiting “The Stone Wife”

The Wayback machine is calling my name tonight. Revisiting the images from Helen Pau’s original play “The Stone Wife” always brings me back to the beginning of when I started shooting theatrical productions, and reminds me that the tools and cameras I was using back then haven’t changed much at all today.

See the whole gallery here.

Get in touch to book photography for your theatrical production.

Get social:

twitter-logo-square-black-whitefacebook-blk


Tags: , , , , , , , , , , , , , , , , , , , , , , , , , , , , , , , , , , , , , , , , ,
Posted in Actors, Digital, Photography, Portfolio, Production, Promotion, Technical, Technique, Theater, Theatre No Comments »

23 Headshots in One Hour

Missouri Street Theatre‘s production of Once Upon a Mattress needed portraits of all 23 of their cast, and we had an hour to set up and light on location, and then one hour to shoot all 23 people. Up to the task? Of course I was…but it would have been difficult without an assistant to help schlep and set up lights, stand in for test shoots, then take names of all 23 people and help move the line along. That’s where my trusty assistant Victor came in:

I opted for simple: one key light directly above, a silver reflector below, and two back lights camera left and right against white seamless.

The biggest challenge was pulling real expressions out of people instead of the “say cheese” expressions you normally see in wham-bam, super fast cattle call portraits. I had 20 seconds to build rapport with someone who I’d never met, so that I could elicit real expressions and then about a minute and a half to shoot about 7-8 pictures. I was careful not to just spray and pray, and really worked on getting subjects to laugh, smile and express something genuine with their eyes…23 times.

The results were posted in Fairfield’s Downtown Theatre lobby along with each performer’s bio during the run of the show. It was an especially fun assignment since I had once nephew assisting and another nephew performing in the show.

Here’s a little preview of the results, but you’re going to have to see the show if you want to see the final, printed lobby shots:

23_portraits

Info on booking headshots, in studio and on location, can be found on my website.

Posted in Actors, Headshots, Lighting, Musicals, Photography, Portfolio, Portraits, Production, Promotion, Technical, Technique, Theater, Theatre 1 Comment »

The Importance of Being Earnest #1

For Bay Area Stage. See the whole gallery here. Shot with a Canon EOS 7D, 24-70mm f/2.8.

Posted in Cameras, Digital, Photography, Production, Software, Technical, Technique, Theater, Theatre No Comments »

Fujifilm X100S – The Last Compact(ish) Camera I’ll Ever Buy…Until the X300

After owning the original Fujifilm X100 in 2012 for about 4 months, I decided that its “quirks” (read: the things that sucked about it–that’s right, I said it) were things that I decided I couldn’t live with. We took it on a family trip to Oregon, and the resulting photos from that trip are spectacular and live in a printed and bound book. But for me, the resulting images are only half of the equation. The experience of shooting, and how a camera makes me feel–the way it performs, the way it feels in hand, and the way it becomes an extension of my hand and eye is a huge part of what draws me to photography. I found that with the X100, not always, but often enough, I noticed the camera–the same way you notice something on the ground and step over or around it so you don’t trip. Then, 8 feet later, there’s another thing on the ground you have to step over so you don’t trip. Then, 6 feet later…you get the picture. It was getting in my way.

My main issues with it were these:

  • Slow, inaccurate focus that hunts, and can’t focus closely, unless you’re in Macro mode, in which case it works even slower.
  • Manual focus that is simply unusable.
  • Electronic viewfinder does this “stutter” thing right as the camera acquires focus from a half-press of the shutter button. About half a second of lag is the best way I can describe it, and with moving subjects, the resulting photo is not what I intended to compose. It was enough to drive me nuts.

I wanted to love the X100, but I didn’t. I liked it very much, but I didn’t love it. With a now-2-year-old child, speed is very much a concern when it comes to cameras, so i decided to move back to the Micro Four Thirds system with an Olympus PEN E-P3…until I saw the X100S

So let’s move on . The Fujifilm X100S. I bought one. I love it, and there’s nothing (as of this writing) I would change about it. Here’s why:

Virtually every issue I had with the X100 was addressed and fixed or improved. Autofocus is faster. Not as fast as advertised with the .000004 nanosecond autofocus that is claimed (yes, I’m exaggerating), but it is faster. Fast enough, and I’m willing to bet that it will get even faster with future firmware updates. Manual focus? Not only is it usable–it kicks ass. Focus peaking allows me to manually focus faster than any film rangefinder I’ve ever owned. The laggy-EVF-when-half-pressing-the-shutter issue is still present–but much better, and it isn’t bad enough to bother me. In respect to speed, everything about the camera is faster, and I feel that the X100s is the camera that the X100 should have been.

There is one feature, though, that is above and beyond the “should-have-been-on-the-X100” category: The sensor. The sensor makes beautiful pictures. Not since I bought my very first DSLR in 2004 did I pixel peep a file and say “wow, that is beautiful.” Great highlight retention, excellent shadow detail, and razor sharp. It is worth mentioning that I’ve only owned the X100S for four days, but I did have a chance to put it through the most demanding and difficult of situations that I personally shoot in: a live theatrical production dress rehearsal. Fast shoot, lots of movement, and fast turnaround. Normally I would shoot RAW and do a 24-hour (or less) turnaround of the selects to deliver to a theater company, but in this case, I decided to break one of my longstanding rules with my theatrical photography: Shooting in JPG…with no post production. Just an edit of the selects in Photo Mechanic and up they went on my website. Normally I would shoot in RAW only, and adjust the files to my liking in Lightroom. I felt like I was taking a huge risk, so naturally I shot in RAW + JPG so I could have the RAW file for later use and for archival purposes. But what I delivered to the client were JPGs, right out of camera. I couldn’t be happier, and in one night, I have changed the way I look at my shoot/post workflow for theatrical shoots.

Another spot where the X100S shined is in its consistent and reliable metering–even in a situation that wreaks havoc on a camera’s meter: a stage with brightly spot-lit subjects and backgrounds that often fall to black. With DSLRs, I shoot manual, and spot meter to nail exposure. With the X100S, I shot in aperture priority using Matrix metering (I think Fuji actually calls it “Multi”) and I found myself dailing all the way down to -2 stops to hold highlights, keep shadow detail, and keep the midtones on the actors right where they needed to be. The Fuji nailed it every time.

I did make some adjustments to how the camera handled the JPGs:

  • Pro Neg Standard
  • Color -1
  • Sharpness -1
  • Highlight Tone -1
  • Shadow Tone -1
  • Noise Reduction -2

This resulted in the camera getting really close to how I would process a RAW file in Lightroom. Default JPGs in most digital cameras are always too saturated, contrasty, and over-sharpened to my eyes, and I find that noise reduction just sacrifices details to produce a less-noisy file. I really don’t care about noise. Remember the grain in that stuff we used to shoot with? What was it called? Oh yeah, film. OMG, this grain is ruining my pictures! Not once have I had a client complain about a picture having too much chroma noise. Not that it mattered for this last production–the files were clean as a whistle.

Speaking of Lightroom, I haven’t had time to play with RAW files with the 4.4 update, but I’m so much less concerned about it now after seeing the JPG output from the X100S.

Yet another big plus: The X100S is unbelievably silent. I don’t have a scientific comparison but I do believe its even quieter than the X100. I have all the sounds, beeps, and fake shutter clicks turned off. A huge plus when you want to avoid distracting actors.

In all, the camera is everything I want. It’s fast, small, light, and I wouldn’t mind carrying it around all day. The pictures are great, low light performance is the best from any camera I’ve ever owned, and just as importantly, the shooting experience itself is one where the camera absolutely just becomes part of you.

Notes on the theatrical shoot: Sweeney Todd, presented by Bay Area Stage. I shot with both a 7D + 24-70mm f2.8, and the X100S. The whole gallery featuring pictures from both cameras (and a few from my super-compact Canon S110) can be seen here.

Buy the X100S from Amazon.

Posted in Cameras, Digital, Hardware, Personal, Photography, Portraits, Production, Promotion, Technique, Theater, Theatre, Travel 2 Comments »

Review/Retrospective: Panasonic Lumix GF1 and Micro Four Thirds

ALERT: BORING GEAR TALK AT THE BOTTOM OF THIS POST


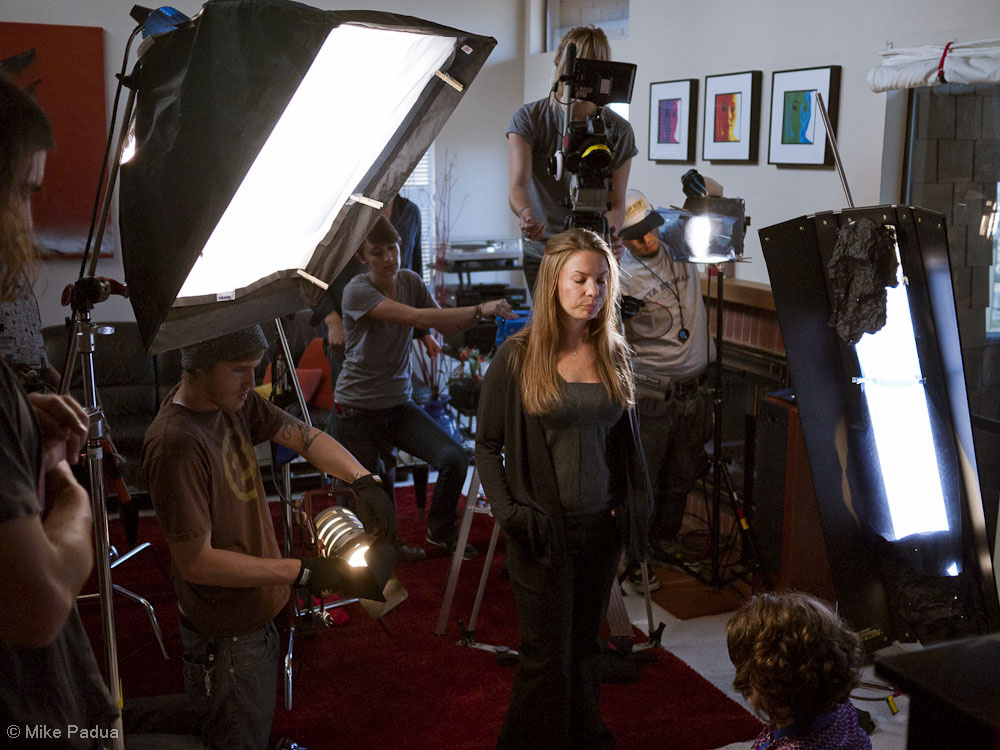
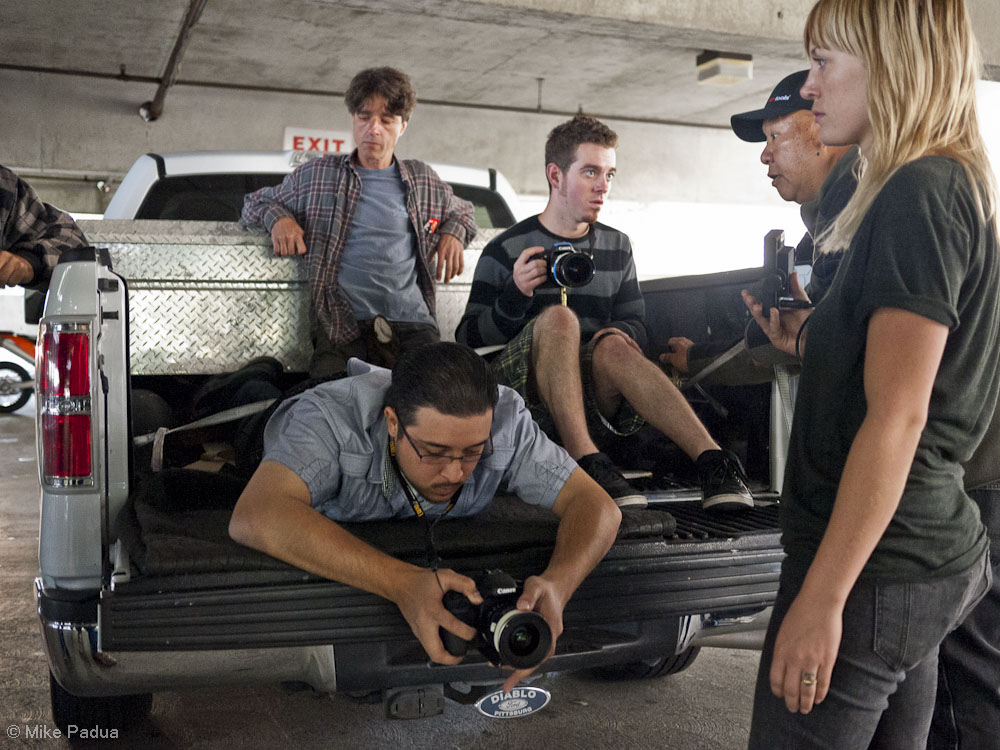
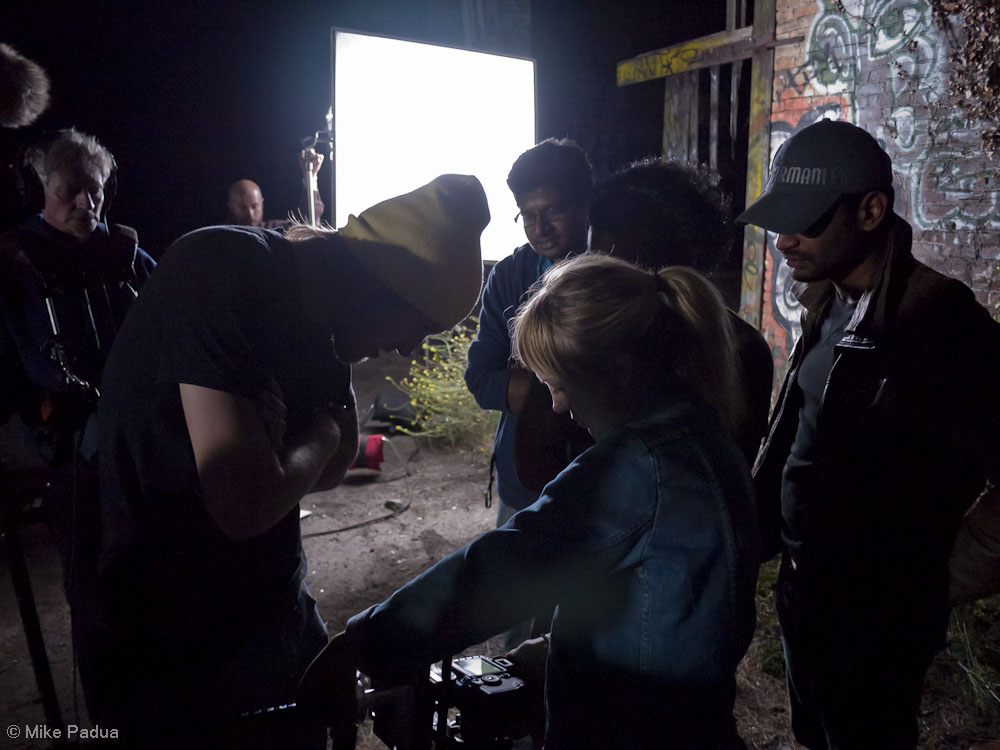
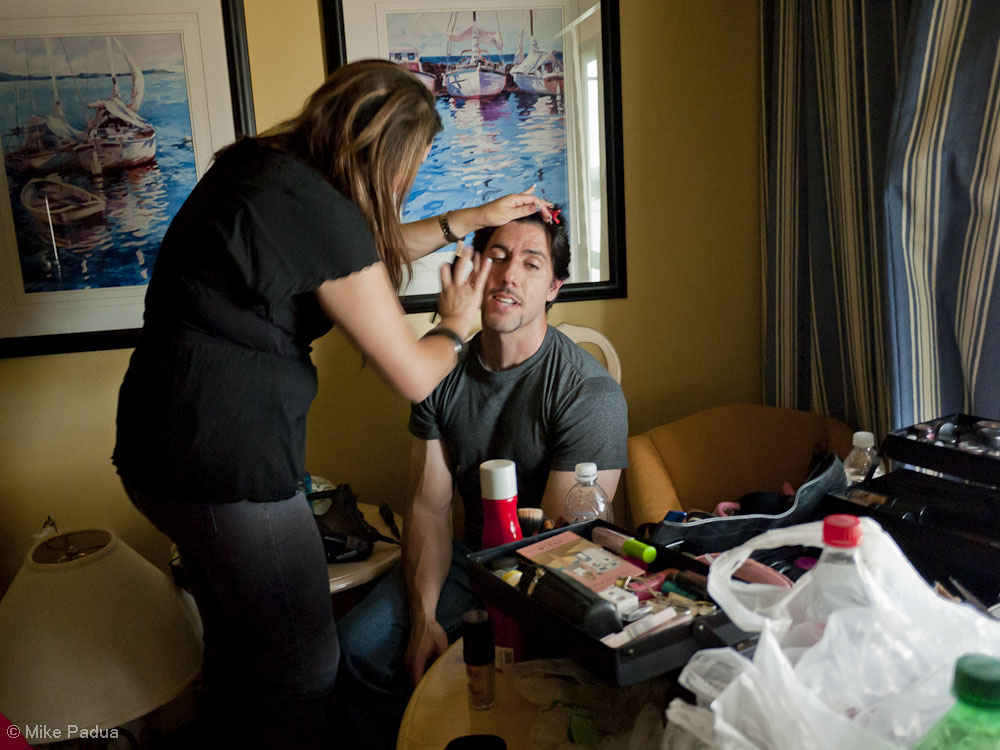
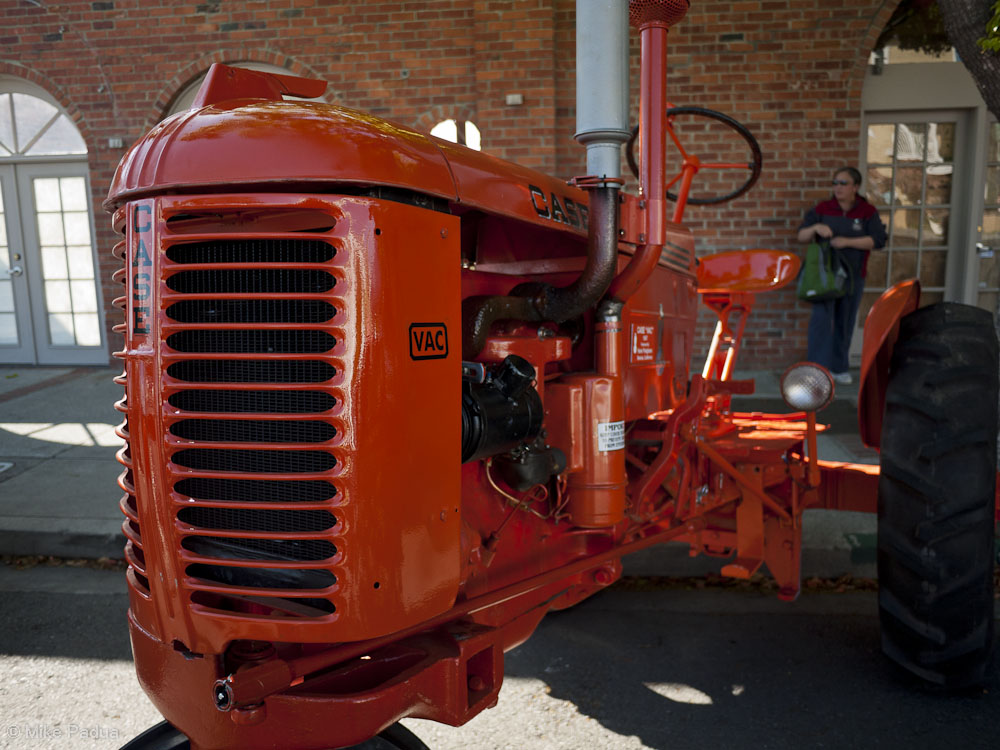
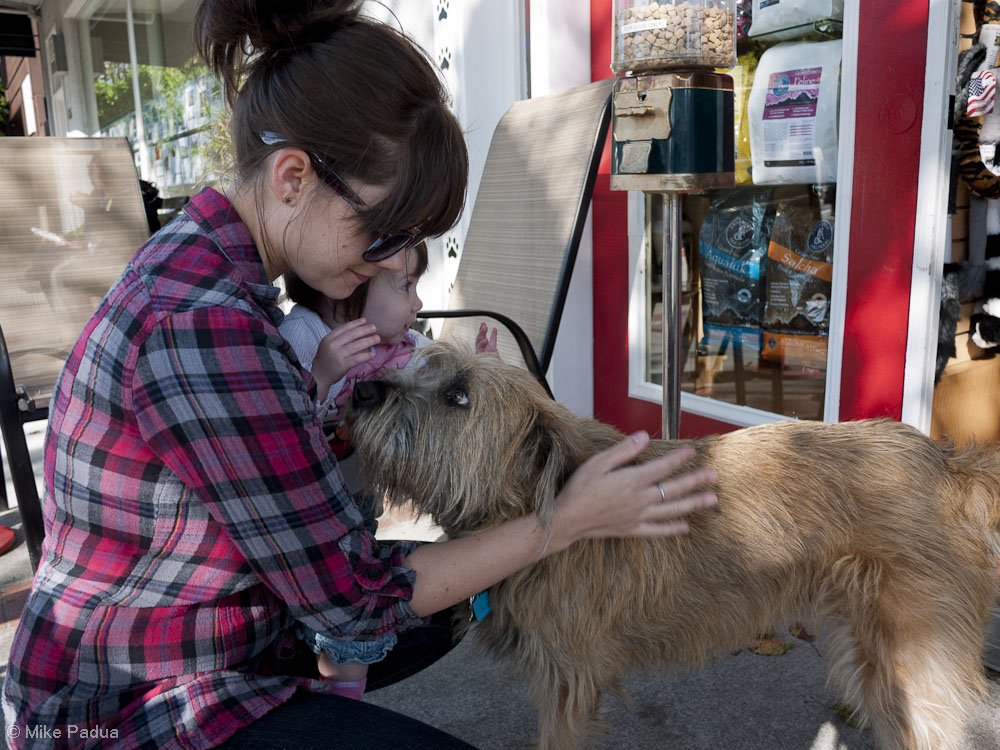
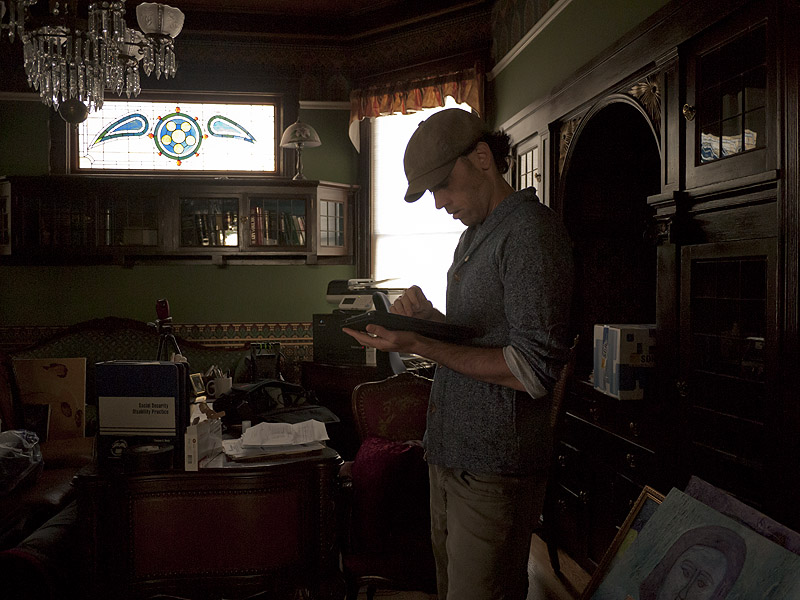
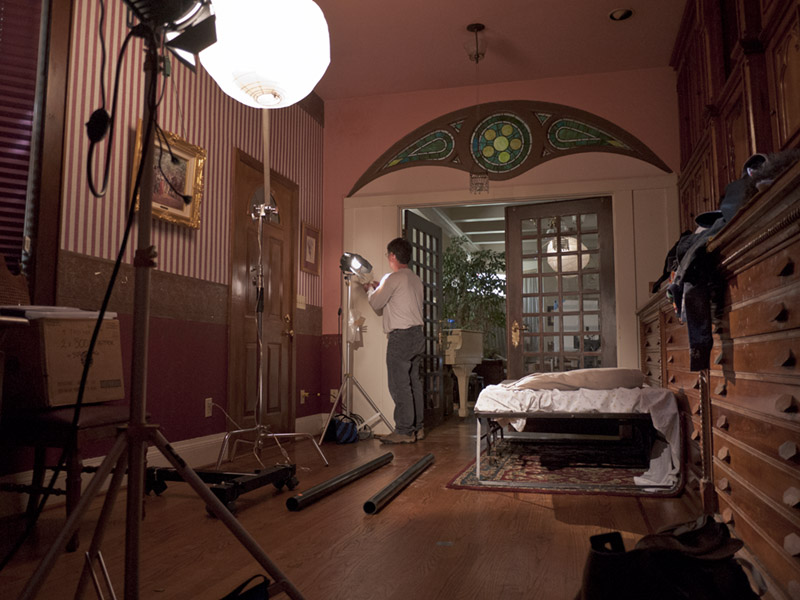
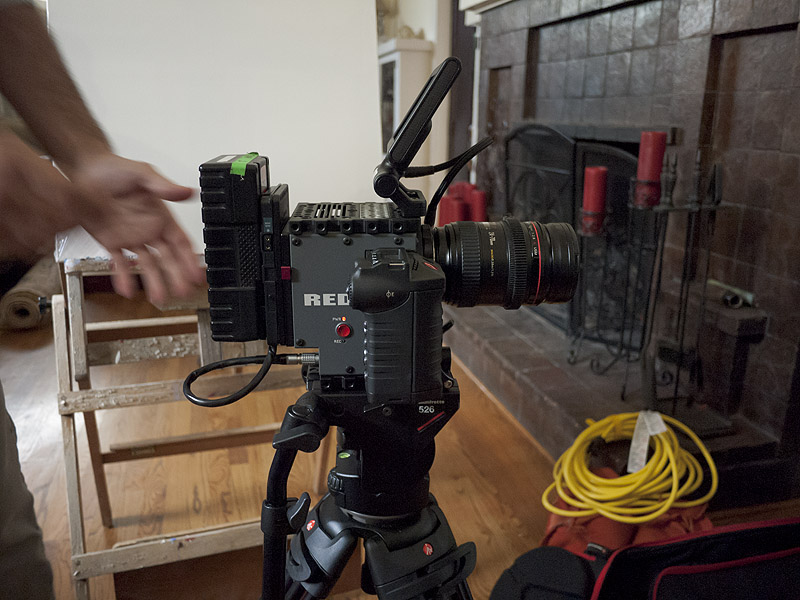
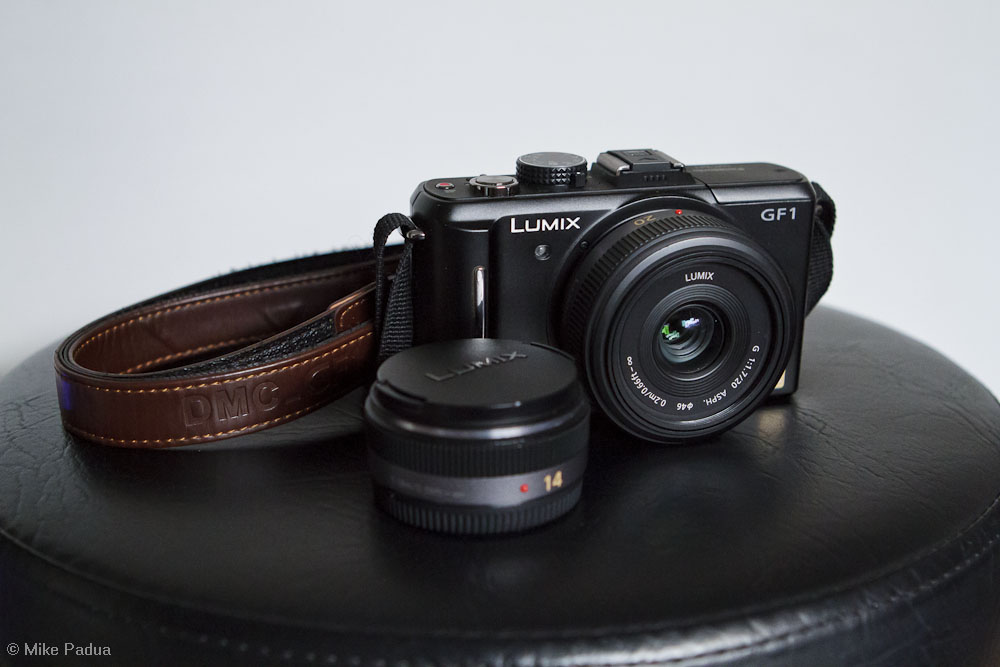
For the last year, I’ve been shooting with with the Micro Four Thirds system. Specifically, the Panasonic Lumix GF1, 20mm f/1.7 and 14mm f/2.5 lenses. Great camera and very fun to shoot with, without the size and bulk. It became a great behind-the-scenes tool when I was on film sets and was my carry-everywhere camera.

Primarily owning Canon SLR gear, I chose Micro Four Thirds and the GF1 for several reasons:

Size

Compared to the SLRs I use to shoot other stuff, M43 gear is absolutely tiny. It’s not super-compact digital tiny, like the Canon S95, but your back and shoulders won’t feel the weight if you have one slung around your shoulder all day. In fact, you’re going to want to carry one around all day because they’re so damn fun to shoot with. Paired with one of the pancake lenses, you’ve got a really great little package, even compared to the smallest Canon SLRs.

Lenses

The fast primes in the M43 system are the absolute kings of the hill. As of this writing, the zooms currently available for the system don’t even hold a candle in my book. The primes are small, fast, and they are optically amazing. I went with the pancakes: the 20mm f/1.7 and the 14mm f/2.5. Outside of their fast apertures and great optical performance, their size is right at the top of the list of reasons why I chose them. I owned the revered (by forum geeks) Panasonic 14-45mm zoom for a couple of weeks, and it was okay, but I didn’t like it because the slow apertures and relatively large barrel size when compared to the primes.

Cost

Okay, so this M43 system isn’t exactly cheap. At the time of release (2009), the GF1 kit with a 20mm or 14-45mm (your choice) was $899. You can pick up a body on Ebay today for about $180, and the lens used for about $350-400. But you have to consider the target market of these “system” cameras: DSLR owners who don’t want to lug their DSLRs around with them all the time. A Canon EOS 7D with a 24-70mm lens is a 5-pound behemoth compared to a GF1 , and yes, once upon a time I was “dedicated” enough to carry the 7D on vacation with me, even though it was left in the hotel room half the time. Never again.

Build Quality

Not all M43 cameras are made the same; the GF1 in particular has a metal body and really solid construction, and it really inspires confidence in me to carry it wherever I go. From what I hear, the GF2 and GF3, and the lower end of the Olympus lines (PEN Lite) aren’t quite as confidence-inspiring in their construction, which is not to say they’re not sturdy. Recently Panasonic has introduced the GX1, the “true” successor to the GF1 despite the GF2, GF3, etc. naming convention.

Handling

The GF1 has dials and buttons laid out in such a tactile and logical way. The rear control dial has a click function which can change the function of that dial on the fly. For example, if you’re shooting in aperture priority, the rear dial controls the aperture, and if you click it in, it controls the exposure compensation. If you’re shooting in manual, the click switches between aperture and shutter. Logical, easy, and it works well. Menus aren’t crazy deep and the important functions have buttons assigned to them (ISO, metering mode, AF mode, white balance). It isn’t the all-dial-and-wheel super fast control you have with a DSLR, but this isn’t a DSLR and you’ve got less real estate to deal with. Considering that, the controls across the back and top don’t feel cramped in the least bit. Their is also a dedicated video button next the shutter button. Want to make a movie? There is no dial to turn or menu to dig into–just press the video button and you’re making movies. If you want, you can use the top dial control to kick it into video mode and disable the dedicated video button altogether–and this is only one example of how customizable this camera is.

Focus is quick, and from what I understand, at the time of release it was best-in-class. To this day, I still find it nice and snappy, but naturally not as fast as what you’d find on an SLR. Never at any point did I feel like it struggled for focus, and when pushed to its limit in, say, a very dark room, it still found focus pretty well. Shutter lag is negligible; I’m sure you can find a spec on that somewhere if you Google it.

It is worth pointing out that these cameras are not meant to replace DSLRs for those that actually need what DSLRs offer. Don’t expect to shoot a sporting event with one of these and end up with something that might grace the cover of Sports Illustrated. Compared to a DSLR, these are simply not as fast and responsive. But compared to most compacts, they are damn fast, and they sure as hell are responsive.

Pictures (duh)

The system takes great pictures. Not much more to say. If you want crazy dynamic range, go elsewhere. These cameras are digital and make no bones about it. But the aforementioned lenses are sharp and beautiful. They shoot RAW , and I shoot in RAW pretty much 100% of the time. I didn’t use any of the JPG presents–I like to get the colors I want with RAW files. High ISO is good, perfectly usable at up to the maximum 3200 for the GF1. There are cameras in this system, and in other systems, that shoot astronomically high ISOs, but jesus, what’s so shitty about taking pictures in good light that we need to take pictures in near darkness?

Goodbye (temporarily)

In all, I really found the system fun to shoot with, with no glaring drawbacks (personally). I couldn’t stop shooting with the system, and I like I mentioned, it made me want to shoot more and more. However, I’ve decided to part with it for the time being. One aspect that I love about DSLRs are the eye-level viewfinders, and I really missed that with this system. The GF1 has a viewfinder accessory which I owned for a couple of days. It absolutely sucked, so up on Ebay it went. Grainy, laggy, crappy color. It was like an EVF from a 1990’s Hi-8 Sony Handycam. So I went looking for a camera that had either a great optical viewfinder or a decent electronic viewfinder. Hello, Fujifilm X100–it has both an OVF and EVF. As usual, my late-to-the-party review on that camera is forthcoming.

Summary

Fun to shoot with. Responsive with just enough buttons and dials to keep things fast and under control. Great pictures, decent high-ISO capability. Viewfinder accessory for this particular system sucked, though I understand the Olympus viewfinders are much better. Go ask Google. Great camera to bring with you everywhere you go so you don’t have to use the “DSLR is too big/heavy” excuse.

Posted in Hardware, Photography, Technical, Technique, Technology, Workflow No Comments »

Lenses for Theatrical Photgraphy

More and more people are asking about the right lenses for photographing theatre, so here are my 2 cents. There are so many choices but my general advice is this:  Get the fastest glass you can afford–if you do this kind of photography a lot, it’s worth it. By “fastest,” I mean the largest possible maximum aperture. In terms of flexibility, something like a 24-70mm with a constant f2.8 is great, but you’ll find with some theatre productions, you will still have to bump your ISO very high, because they can be dark. Very dark. Here is an example of something I shot at ISO 3200, f2.8 at 1/30th . A very challenging production because scenes like this one were so dark and obscured with fog.

Had I shot the above picture with a lens that had an aperture range of something like f3.5-5.6, I would have to bring my shutter speed down to something unacceptably low; with all actors’ movement, a blurry picture is all but guaranteed.

Another thing to think about is your focal length coverage. If the theater is big with a high stage, you may find yourself backing up 5-10 rows and shooting with long glass. If it’s small and intimate, you might find yourself right up against the stage and shooting wide to medium. For the most flexibility, a 24-70mm f2.8 will give you great coverage, but if you have the means, I would suggest adding something like a 70-200mm f2.8 so you can get close-ups of actors and their expressions. You really have to think about covering a show with everything from wide shots that showcase the scope of the set, all the way to tight, emotionally evocative expressions on actors’ faces.

Then, there’s the prime lens school of thought. I personally love using primes. I shot this entire production with a 50mm f1.4: http://www.mikepadua.com/Theater/ihatehamlet/12858869_8FhdcP#928216556_YqvWr. However, I had a large area to move about in front of the stage, which allowed me to “zoom” in and out (with my legs!) as I needed. You won’t always have this luxury. While I enjoy shooting like this, I prefer zooms for speed and flexibility and didn’t feel a need to keep the primes in my bag.

From a budget standpoint, if you are shooting with crop-sensor body like a the Canon 7D or Nikon D7000, this type of lens is a great place to start:

Very economical, with a zoom range of 17-50mm (equivalent to 27-80mm in 35mm terms) and most importantly, a constant aperture of f2.8 throughout the zoom range. I shot many of my first shows with this lens. It’s got shortcomings like you’d expect from any budget glass but nothing fatal.

I had to buy and sell a few lenses before I settled on my trusted combo (and many will tell you the obvious choices) of a 24-70mm f2.8 and a 70-200mm f2.8. There are lots of reviews and opinions floating around on the internet, but in the end it comes down to your preferences and what works for you. If you’re not ready to make a big investment in a new lens yet, there’s always rental houses like BorrowLenses.com which I’ve had great luck with. And before you put down money on a new lens, try shooting with what you already have. You may find it does the job just fine. If it doesn’t, you’ll discover its shortcomings and your needs will point you in the right direction.

Kudos to http://markhemmings.com for getting the conversation started!

Posted in Hardware, Photography, Production, Promotion, Technical, Technique, Technology, Theater, Theatre No Comments »

Promotional Photography for “Othello”

Vallejo Shakespeare in the Park presents "Othello"

Vallejo Shakespeare in the Park will be presenting “Othello” this summer and I had the opportunity to create some promo photographs for their show. The main differences with the promotional photography and production photography is that with the promo stuff, I light and pose the actors. With production photos, I’m basically a fly on the wall during a dress rehearsal–commonly during tech week, and more commonly during the very last dress rehearsal before a show opens–when the show is picture ready.

Theatre companies need the promo pictures well before a show opens so they can (you guessed it) promote the show with plenty of time before it opens. This is especially important because prospective audience members are more likely to go see a show if they have a way connect with the characters beforehand.

For the shot(s) above, I shot the actors separately against a green screen, lit them with small flashes with shoot-through umbrella attachments, and created a composite in Photoshop. I went into the shoot with a firm concept of what the final product was going to be, so I lit and posed each actor accordingly.

For Othello, I knew I wanted to bring out the contours of his face and create depth with strong shadows, so I placed my main light camera left at a hard 90 degree angle towards the subject, which fills in his face but also casts a distinct shadow to the right of the camera. I then placed a fill light at a 45 degree angle camera right. This gave me a face that was well lit, and shows us exactly what Othello looks like, but it’s not flat and evenly lit.

For Iago, I wanted his face more filled in, but with one side more  “lost” in shadow–almost as if he was being obscured by Othello’s shadow. I placed the key light 45 degrees camera right and angled his face just so that one side was almost completely obscured except for his eye–people always focus on the eyes, so I didn’t want to lose it. I had one more light behind and above him to give his hair a little depth, but I didn’t want a classic back/rim light scenario–just a tiny splash of light on his hair.

Finally, I wanted to give Desdemona the same light/shadow depth that I gave Othello. I had to walk the lights back a couple of feet since I shot a bit wider to get more body length. Due to the way she was posed, I noticed that the fill light being at 45 degrees was hitting her flat against her back, and the contours of her arm seemed to get lost, so both the main and fill light were placed 90 degrees on either side of the frame.

I took these shots using the Canon EOS 7D with the ST-E2 Speedlite Transmitterattachment. Even though the 7D features wireless flash control built in, there’s less digging into menus when I use the ST-E2. I used three 430EX II flashes on light stands, two of them with umbrellas.

After the shoot, I went through the usual workflow of Photo Mechanic > Lightroom > Photoshop to create the final composite image you see at the beginning of the post. Lots of fun, and more planning and post-production involved than a dress rehearsal shoot, but the end result was really worth it. One thing I regret is not capturing behind the scenes photos of the lighting setups themselves. Because of limited budgets, I didn’t have an assistant on this shoot so all the lightstand moving was done by yours truly. Hopefully next time I’ll have a bit more time to do so.

Make sure to check out the event here: http://www.facebook.com/event.php?eid=123487851078062

Posted in Hardware, Lighting, Photography, Portfolio, Portraits, Promotion, Technical, Technique, Technology, Theater, Workflow No Comments »

“Hay Fever” Review in Benicia Herald

This was from a while ago, but I hold a special place in my heart for my hometown paper. They reviewed a show at Dreamweavers and used my production stills from the show.

http://beniciaherald.wordpress.com/2010/09/13/charming-%E2%80%98hay-fever%E2%80%99-continues-dreamweavers%E2%80%99-winning-season/

As always, Dreamweavers provided a great show with a lot of beautiful lighting for me to shoot. I never find myself going over ISO 1600 there.

Shot with a Canon EOS 7D, Canon EF 24-70mm f/2.8L, and I set a custom white balance to the key lights to nail accurate colors. I always shoot RAW when shooting theatre (or pretty much anything, for that matter).

I shoot in RAW for a couple of reasons: It lets me fine-tune white balance, even though I set a custom WB at the beginning of the shoot. It also gives me latitude to bump up shadows and tame highlights where necessary. Theatrical lighting, by it’s nature, is quite hard and directional. Where one portion of the scene can be perfectly exposed, another portion can be either lost in total darkness or overexposed and too bright.

To set a custom white balance, I use a standard Kodak 18% Grey Card. There are much fancier white balance systems out there, but this one is simple and accurate. These cards were originally meant for determining exposure, and they work great for that, but the grey is perfectly neutral in color and works beautifully to set white balance for digital cameras.

Here’s the link to the whole gallery.

Posted in Hardware, Lighting, Photography, Production, Promotion, Technical, Technique, Theater, Theatre, Workflow No Comments »

“Firstborn” – Original Play by Tiffany Golden

“Firstborn” was originally a concept for a feature film that was adapted into a play, which premiered at the Black Repertory Group in Berkeley. It’s also where I discovered that focal lengths made for crop sensor cameras such as 17-50mm don’t work quote well for my style, even though I am shooting on a crop sensor camera – a Canon EOS 7D . I’m almost never at the wide end , and sometimes I found myself wanting to be able to zoom in a little more for some tighter crops, even after using my legs to bring me as close as possible to the action.

Speaking of moving around, I always, always, shoot these productions during a dress rehearsal. I never shoot while a crowd is present. I believe that a theatre-goer’s experience is one that shouldn’t be marred by the clicking of a shutter, or a figure running around in the dark and jumping over seats. Usually, it’s the final dress rehearsal before the show opens or previews, because that’s when the set, wardrobe, and makeup is in place, and this naturally makes for the best photographs.

Notably, this play had some stage combat that I was somewhat prepared for; even though I had never seen a run-through, I did read the script, so I knew when an important bit of action was coming up. I always prefer to see a run through, but that’s actually a rare privilege, so in this case I just had to make sure to be a the ready.

See the whole set here.

Posted in Hardware, Photography, Production, Promotion, Technique, Theater, Theatre No Comments »