Technical

Lenses for Theatrical Photgraphy

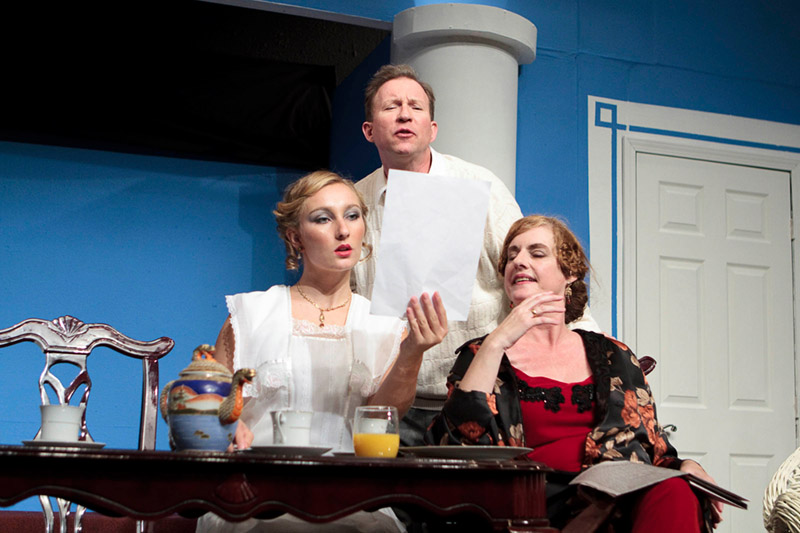
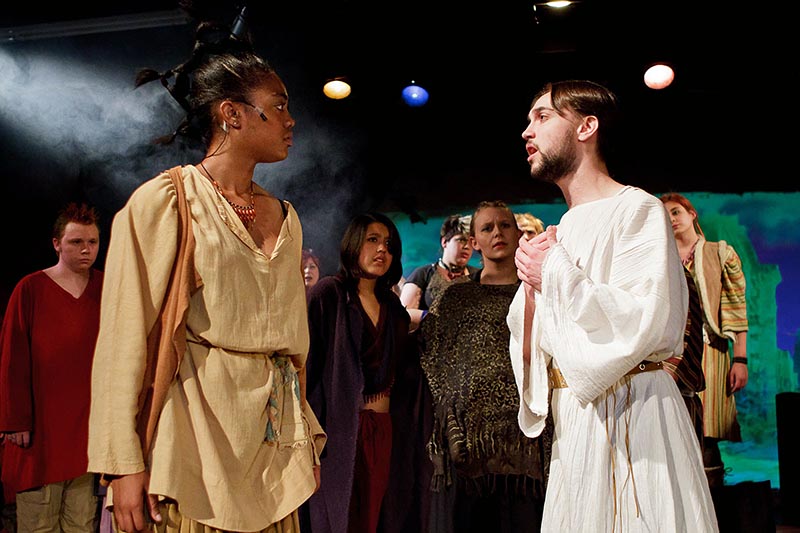
More and more people are asking about the right lenses for photographing theatre, so here are my 2 cents. There are so many choices but my general advice is this:  Get the fastest glass you can afford–if you do this kind of photography a lot, it’s worth it. By “fastest,” I mean the largest possible maximum aperture. In terms of flexibility, something like a 24-70mm with a constant f2.8 is great, but you’ll find with some theatre productions, you will still have to bump your ISO very high, because they can be dark. Very dark. Here is an example of something I shot at ISO 3200, f2.8 at 1/30th . A very challenging production because scenes like this one were so dark and obscured with fog.

Had I shot the above picture with a lens that had an aperture range of something like f3.5-5.6, I would have to bring my shutter speed down to something unacceptably low; with all actors’ movement, a blurry picture is all but guaranteed.

Another thing to think about is your focal length coverage. If the theater is big with a high stage, you may find yourself backing up 5-10 rows and shooting with long glass. If it’s small and intimate, you might find yourself right up against the stage and shooting wide to medium. For the most flexibility, a 24-70mm f2.8 will give you great coverage, but if you have the means, I would suggest adding something like a 70-200mm f2.8 so you can get close-ups of actors and their expressions. You really have to think about covering a show with everything from wide shots that showcase the scope of the set, all the way to tight, emotionally evocative expressions on actors’ faces.

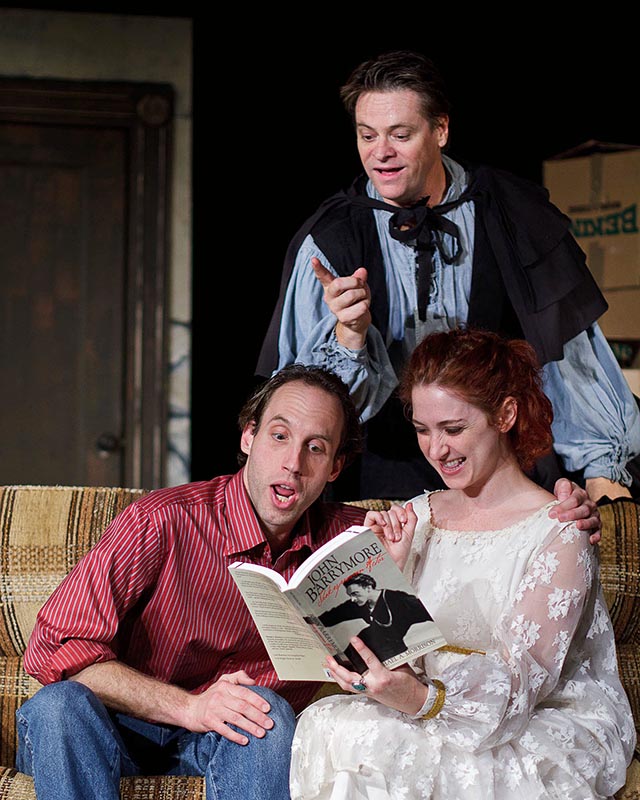
Then, there’s the prime lens school of thought. I personally love using primes. I shot this entire production with a 50mm f1.4: http://www.mikepadua.com/Theater/ihatehamlet/12858869_8FhdcP#928216556_YqvWr. However, I had a large area to move about in front of the stage, which allowed me to “zoom” in and out (with my legs!) as I needed. You won’t always have this luxury. While I enjoy shooting like this, I prefer zooms for speed and flexibility and didn’t feel a need to keep the primes in my bag.

From a budget standpoint, if you are shooting with crop-sensor body like a the Canon 7D or Nikon D7000, this type of lens is a great place to start:

Very economical, with a zoom range of 17-50mm (equivalent to 27-80mm in 35mm terms) and most importantly, a constant aperture of f2.8 throughout the zoom range. I shot many of my first shows with this lens. It’s got shortcomings like you’d expect from any budget glass but nothing fatal.

I had to buy and sell a few lenses before I settled on my trusted combo (and many will tell you the obvious choices) of a 24-70mm f2.8 and a 70-200mm f2.8. There are lots of reviews and opinions floating around on the internet, but in the end it comes down to your preferences and what works for you. If you’re not ready to make a big investment in a new lens yet, there’s always rental houses like BorrowLenses.com which I’ve had great luck with. And before you put down money on a new lens, try shooting with what you already have. You may find it does the job just fine. If it doesn’t, you’ll discover its shortcomings and your needs will point you in the right direction.

Kudos to http://markhemmings.com for getting the conversation started!

Posted in Hardware, Photography, Production, Promotion, Technical, Technique, Technology, Theater, Theatre No Comments »

Promotional Photography for “Othello”

Vallejo Shakespeare in the Park presents "Othello"

Vallejo Shakespeare in the Park will be presenting “Othello” this summer and I had the opportunity to create some promo photographs for their show. The main differences with the promotional photography and production photography is that with the promo stuff, I light and pose the actors. With production photos, I’m basically a fly on the wall during a dress rehearsal–commonly during tech week, and more commonly during the very last dress rehearsal before a show opens–when the show is picture ready.

Theatre companies need the promo pictures well before a show opens so they can (you guessed it) promote the show with plenty of time before it opens. This is especially important because prospective audience members are more likely to go see a show if they have a way connect with the characters beforehand.

For the shot(s) above, I shot the actors separately against a green screen, lit them with small flashes with shoot-through umbrella attachments, and created a composite in Photoshop. I went into the shoot with a firm concept of what the final product was going to be, so I lit and posed each actor accordingly.

For Othello, I knew I wanted to bring out the contours of his face and create depth with strong shadows, so I placed my main light camera left at a hard 90 degree angle towards the subject, which fills in his face but also casts a distinct shadow to the right of the camera. I then placed a fill light at a 45 degree angle camera right. This gave me a face that was well lit, and shows us exactly what Othello looks like, but it’s not flat and evenly lit.

For Iago, I wanted his face more filled in, but with one side more  “lost” in shadow–almost as if he was being obscured by Othello’s shadow. I placed the key light 45 degrees camera right and angled his face just so that one side was almost completely obscured except for his eye–people always focus on the eyes, so I didn’t want to lose it. I had one more light behind and above him to give his hair a little depth, but I didn’t want a classic back/rim light scenario–just a tiny splash of light on his hair.

Finally, I wanted to give Desdemona the same light/shadow depth that I gave Othello. I had to walk the lights back a couple of feet since I shot a bit wider to get more body length. Due to the way she was posed, I noticed that the fill light being at 45 degrees was hitting her flat against her back, and the contours of her arm seemed to get lost, so both the main and fill light were placed 90 degrees on either side of the frame.

I took these shots using the Canon EOS 7D with the ST-E2 Speedlite Transmitterattachment. Even though the 7D features wireless flash control built in, there’s less digging into menus when I use the ST-E2. I used three 430EX II flashes on light stands, two of them with umbrellas.

After the shoot, I went through the usual workflow of Photo Mechanic > Lightroom > Photoshop to create the final composite image you see at the beginning of the post. Lots of fun, and more planning and post-production involved than a dress rehearsal shoot, but the end result was really worth it. One thing I regret is not capturing behind the scenes photos of the lighting setups themselves. Because of limited budgets, I didn’t have an assistant on this shoot so all the lightstand moving was done by yours truly. Hopefully next time I’ll have a bit more time to do so.

Make sure to check out the event here: http://www.facebook.com/event.php?eid=123487851078062

Posted in Hardware, Lighting, Photography, Portfolio, Portraits, Promotion, Technical, Technique, Technology, Theater, Workflow No Comments »

“Hay Fever” Review in Benicia Herald

This was from a while ago, but I hold a special place in my heart for my hometown paper. They reviewed a show at Dreamweavers and used my production stills from the show.

http://beniciaherald.wordpress.com/2010/09/13/charming-%E2%80%98hay-fever%E2%80%99-continues-dreamweavers%E2%80%99-winning-season/

As always, Dreamweavers provided a great show with a lot of beautiful lighting for me to shoot. I never find myself going over ISO 1600 there.

Shot with a Canon EOS 7D, Canon EF 24-70mm f/2.8L, and I set a custom white balance to the key lights to nail accurate colors. I always shoot RAW when shooting theatre (or pretty much anything, for that matter).

I shoot in RAW for a couple of reasons: It lets me fine-tune white balance, even though I set a custom WB at the beginning of the shoot. It also gives me latitude to bump up shadows and tame highlights where necessary. Theatrical lighting, by it’s nature, is quite hard and directional. Where one portion of the scene can be perfectly exposed, another portion can be either lost in total darkness or overexposed and too bright.

To set a custom white balance, I use a standard Kodak 18% Grey Card. There are much fancier white balance systems out there, but this one is simple and accurate. These cards were originally meant for determining exposure, and they work great for that, but the grey is perfectly neutral in color and works beautifully to set white balance for digital cameras.

Here’s the link to the whole gallery.

Posted in Hardware, Lighting, Photography, Production, Promotion, Technical, Technique, Theater, Theatre, Workflow No Comments »

Lytro Camera


The internet is abuzz right now with news of this “Light Field camera.”

It lets you focus on any plane of the photo after you take the picture.  Very much worth checking out even if you have a passing interest in photography.

http://www.lytro.com/

For those more technically inclined, you can view the tech behind it here:

http://graphics.stanford.edu/papers/lfcamera/

Posted in Hardware, Photography, Technical, Technology No Comments »

Theatre Portfolio Edit

I recently took part in Theatre Bay Area‘s annual Vendor Conference in San Francisco where I had an opportunity to show my best work to the Theatre community. This facilitated a heavy edit of my current portfolio of theatrical images where I made selects and post-processed from scratch every show I’ve shot, from the beginning. It was a long process but the results were worth it, and it made me realized how much my taste, and ability to post-process an image, has changed. I used an X-Rite Eye-One Display 2 (tip: Pantone, GretagMacbeth, and X-Rite versions of this product are all the same thing) to calibrate my monitor so I could make sure that the colors displayed on my monitor, and eventually printed, were accurate, taking the guesswork out of the equation.

Having to edit many thousands of images down to about 100 to show at my table, and down to six to print large on my display, is not easy, and better left to professional editors, but just not feasibly in the budget for me so I had to fire up the coffeemaker and hunker down for about a week. As always, I used Photo Mechanic for it’s speed to make selects and add ratings, and then Adobe Photoshop Lightroom 3 to adjust exposure, tone, and color.

I added Photo Mechanic to my workflow about a year ago because it’s just plain fast. I use it only for selection and rating–basically editing down a take to the best photos to then process and deliver. It is a huge time saver for me, because a single show will, on average, yield about 1000 – 1200 photos. Of those, only 40-60 will be delivered, and they need to be delivered fast. I’ve made it a policy to deliver selects within 24 hours; the clients need the photos to publicize the production on their website, Facebook, and send photos to news outlets.

Take a look at the newly edited (and ever-changing) portfolio here.

Posted in Hardware, Photography, Portfolio, Technical, Technology, Theatre, Workflow No Comments »

Julius Caesar – Specials

I was asked to shoot “specials” for a modern-styled rendition of Julius Caesar. Specials are promotional photographs to be used in marketing materials before the production starts. The big difference with the specials is that usually, I will do the lighting in a studio space instead of using the stage lights. I’ve always been a big fan of of promo photographs because I feel that a prospective audience member is more likely to want to see a play when they can see, and connect with, actors in the production.

Take a look Broadway.com and you’ll see that the website is filled with photos that entice someone to buy a ticket to see a show. Another great example are movie posters–they almost always feature a photograph of the lead players to establish a connection for someone who is trying to decide which play or movie to see.

A special thanks to the director, cast, and crew of this show–this shoot was a lot of fun.

On a technical note, the battery in my ST-E2 wireless flash trigger went dead, and I didn’t have a spare. Luckily, we were in a small space and I just used the 7D’s built-in wireless flash control. Whew. I promptly bought spare batteries for the ST-E2.

I used some pretty simple tools to light these: One 430EX Speedlite on a light stand as a main light, One 420EX Speedlite as a backlight. I did not have umbrellas for this shoot–not because I forgot them, but because I didn’t own any. To diffuse and soften the main light, I used a fold-out reflector that has a removable cover that turns it into a giant diffuser, set up on its own stand. If I didn’t have something to diffuse the light, I would have bounced the light off of something–theatres always have prop doors or partitions laying around, so there’s a lot of ways to get creative to soften the light.

Posted in Hardware, Lighting, Photography, Portraits, Promotion, Technical, Technique, Theater, Theatre No Comments »